1. הקדמה
This manual provides essential information for the safe and efficient operation of your Technaxx Wireless CarPlay & Android Car Monitor TX-361. Please read this manual thoroughly before using the device and retain it for future reference. The TX-361 is designed to integrate modern smartphone connectivity, including Apple CarPlay and Android Auto, into your vehicle without requiring a complex car radio replacement. It also features an integrated DAB digital radio for enhanced audio experience.
2. מידע בטיחות
- יש להפעיל את המכשיר תמיד באחריות ובהתאם לחוקי התנועה המקומיים. נהיגה מוסחת עלולה להוביל לתאונות.
- אל תנסה לפרק או לשנות את המכשיר. פעולה זו עלולה לבטל את האחריות ולהוות סיכוני בטיחות.
- הרחק את המכשיר מטמפרטורות קיצוניות, אור שמש ישיר ולחות.
- ודא שהמכשיר מותקן בצורה מאובטחת ואינו חוסם את הגישה שלך view או להפריע לשלטי הרכב.
- השתמשו רק בכבל החשמל ובאביזרים המצורפים.
- If the device malfunctions, disconnect it from the power source and contact customer support.
3. תכולת החבילה
ודא שכל הפריטים המפורטים להלן כלולים בחבילה שלך:
- DAB 7-inch CarPlay with Touch Screen TX-361
- Power Supply (USB-A to USB-C, 1.5m cable)
- כבל AUX (1 מטר)
- אנטנת DAB
- Holder (Mounting Bracket)
- מדריך למשתמש
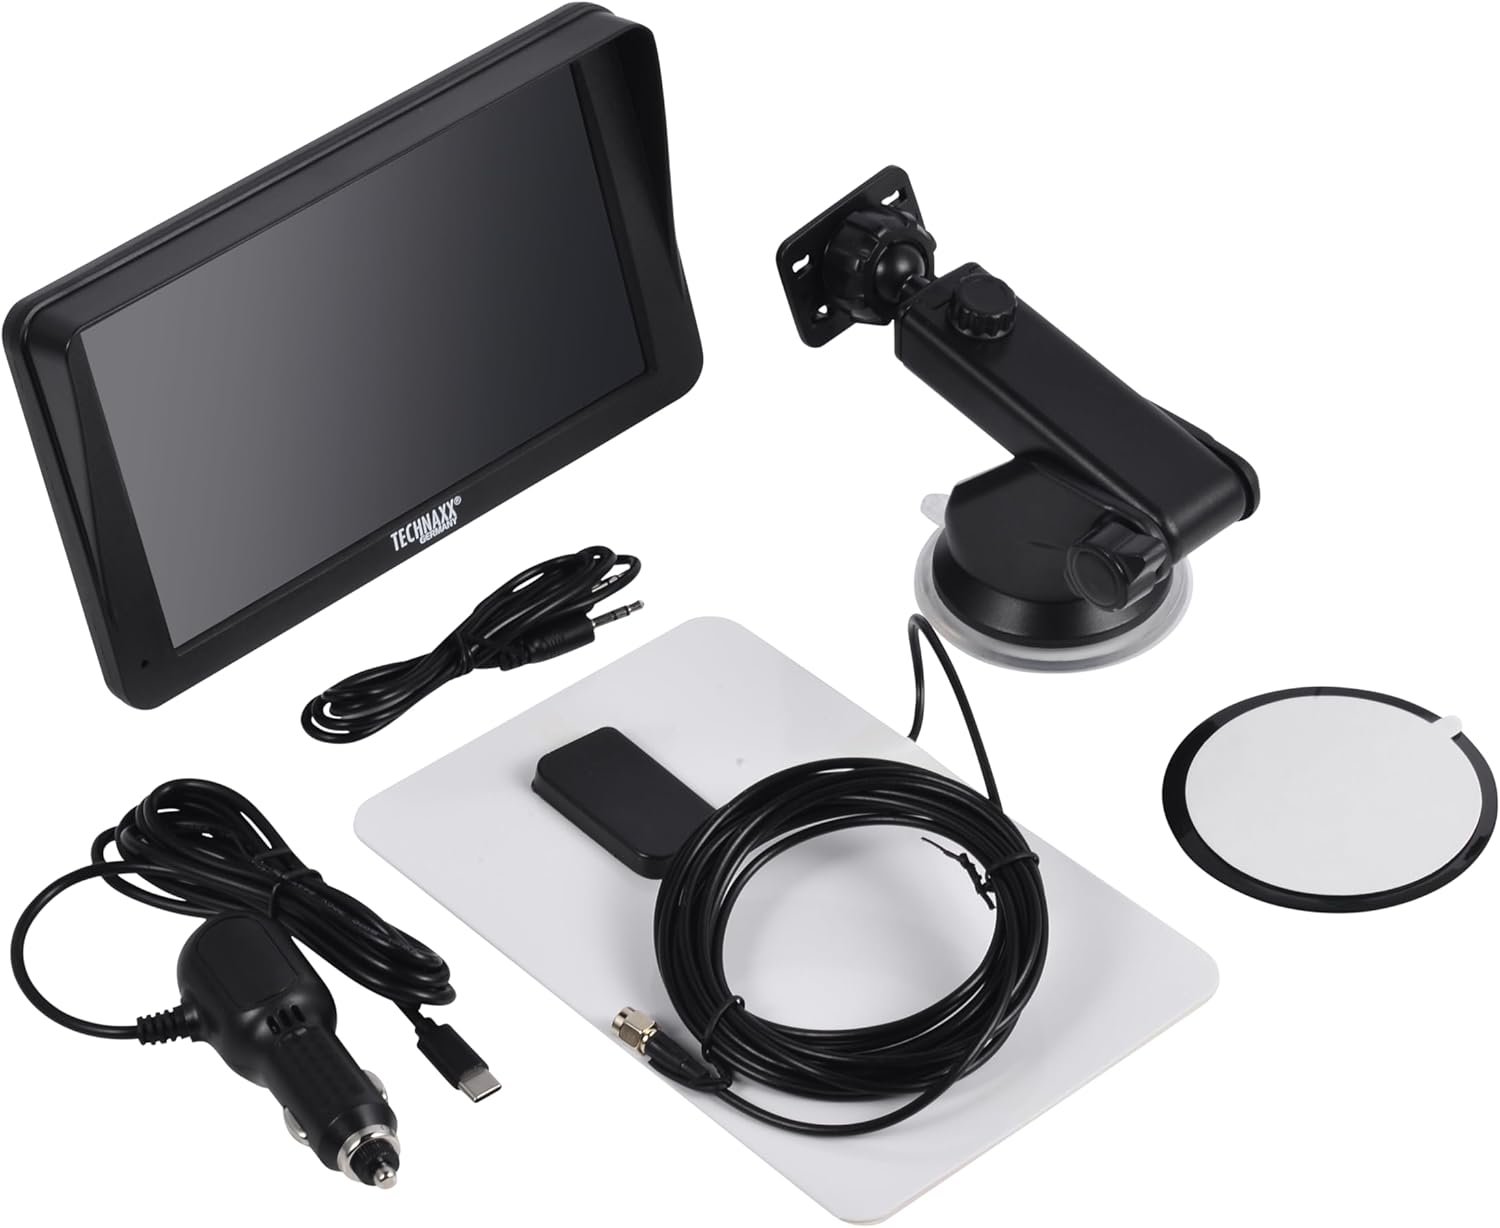
Image: All components included in the Technaxx TX-361 package, neatly laid out.
4. המוצר נגמרview
Familiarize yourself with the main components of your TX-361 monitor.
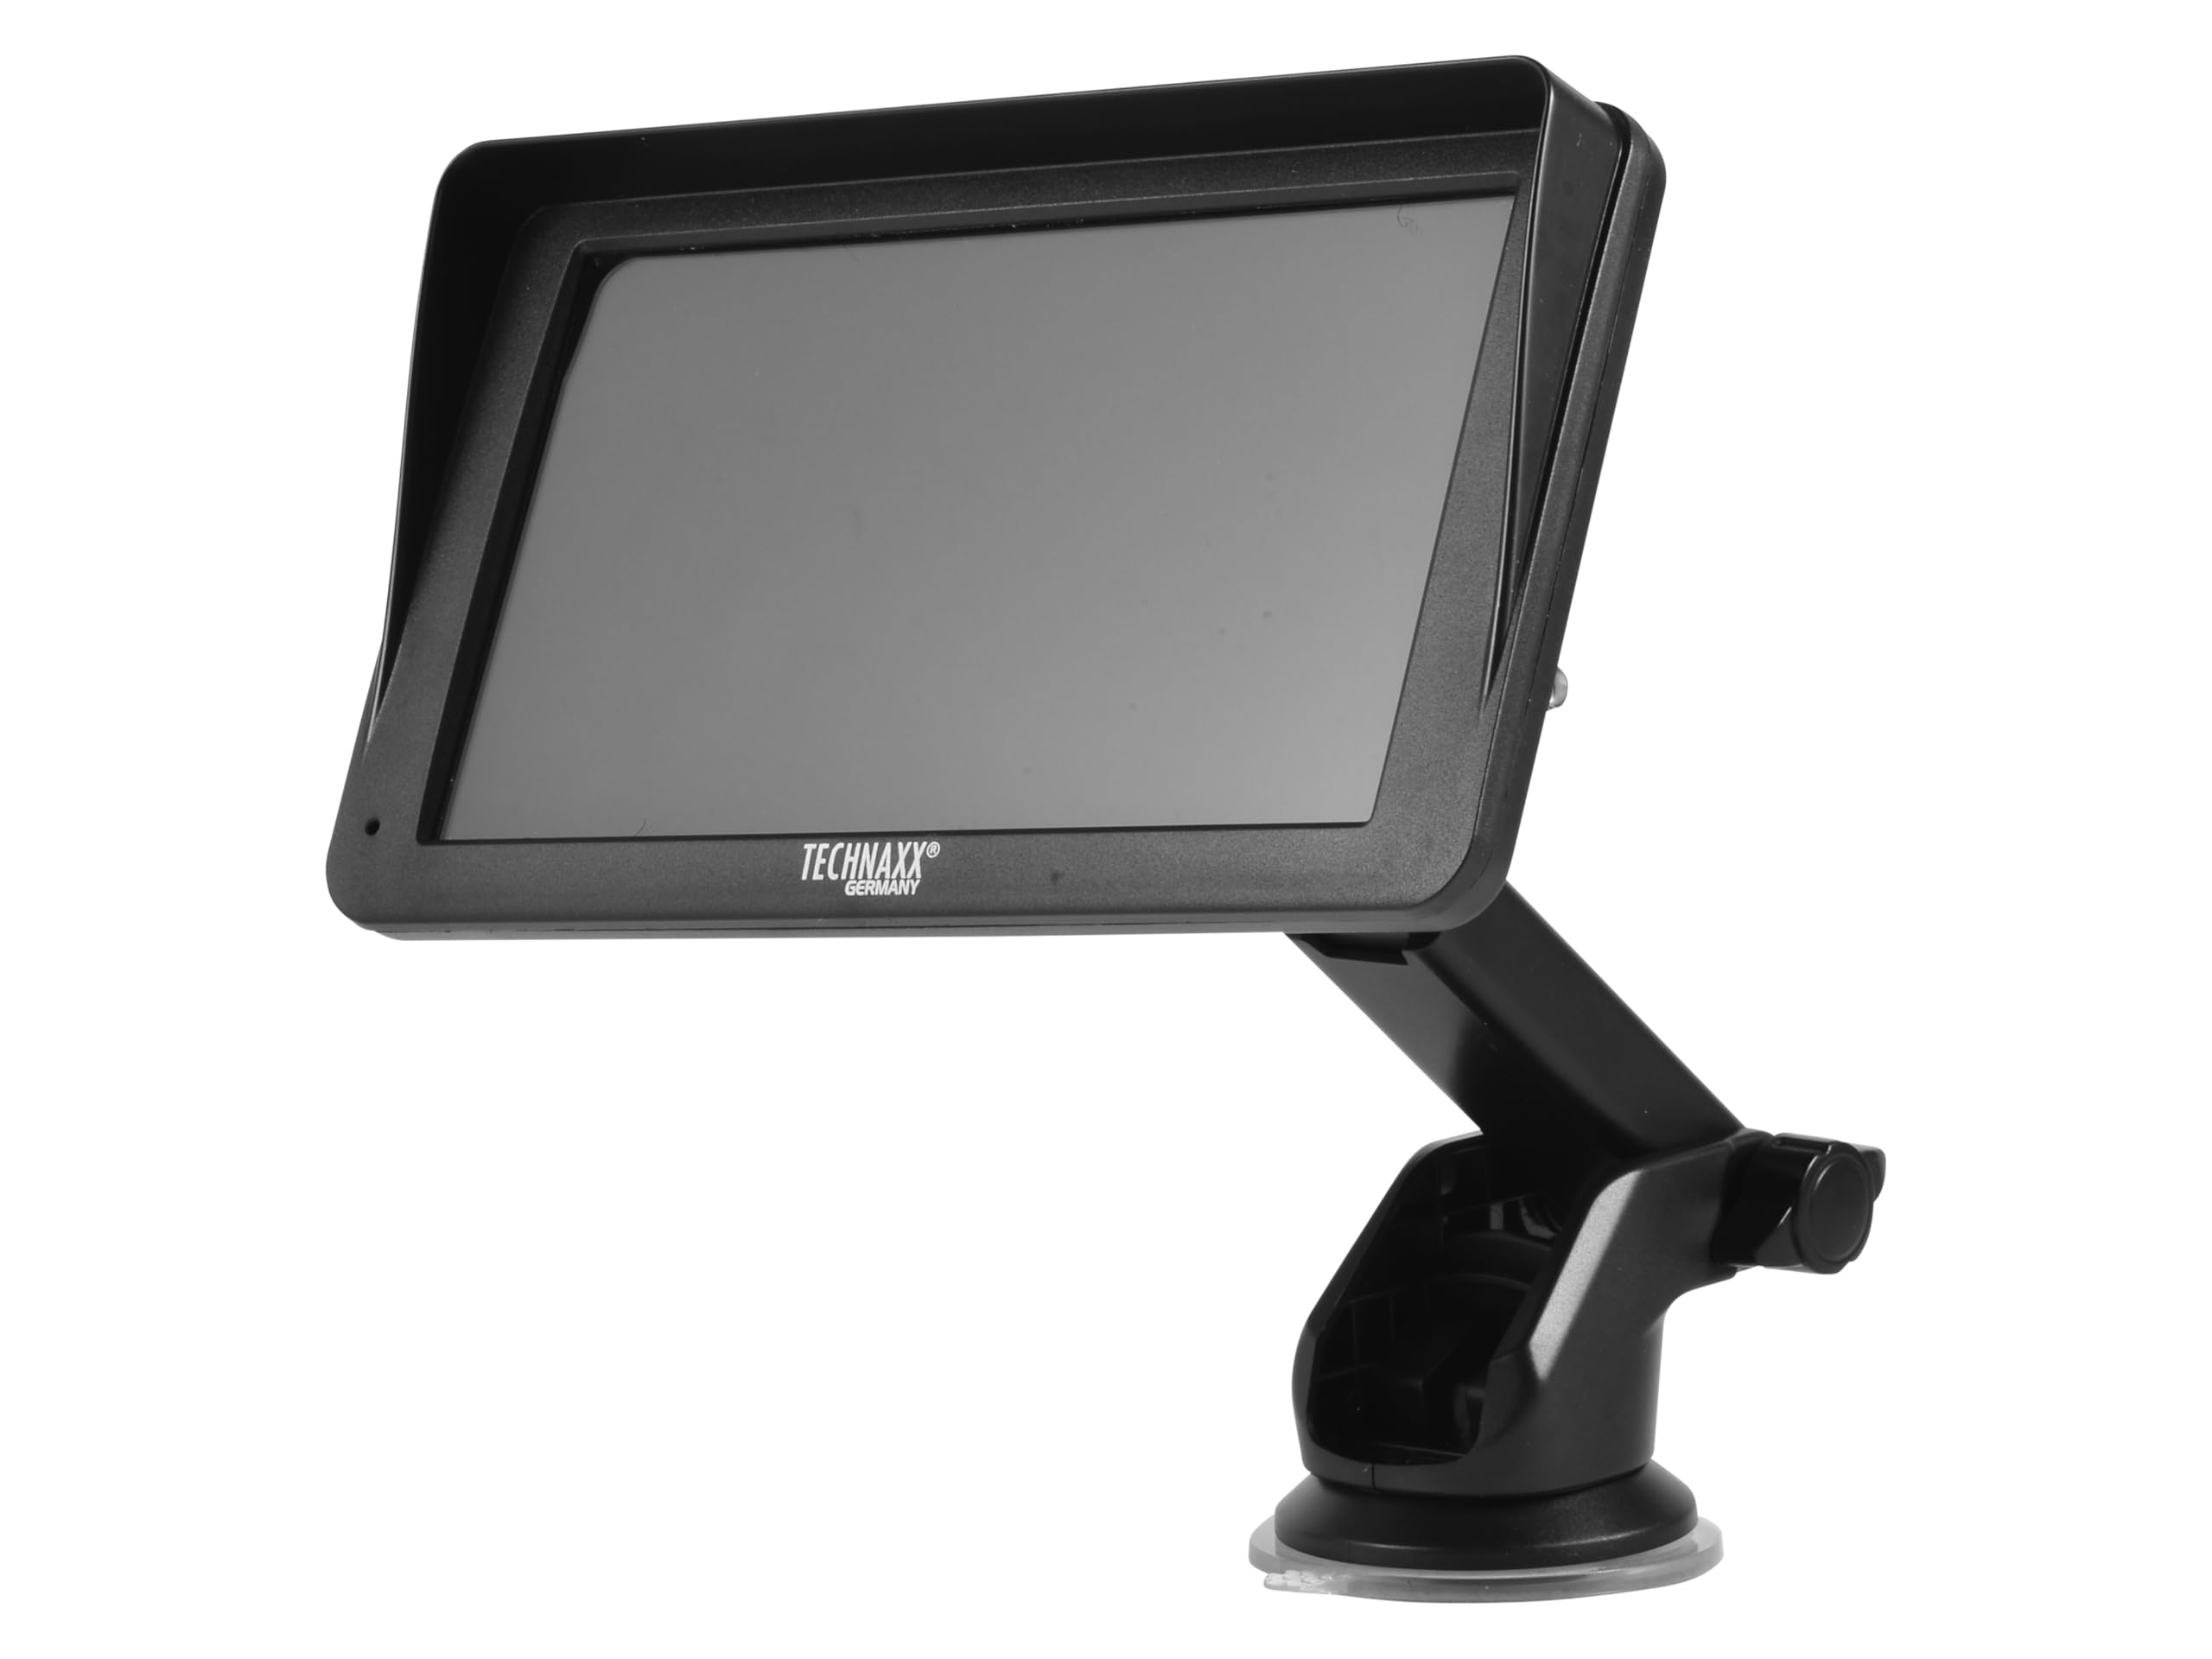
תמונה: חזית view of the TX-361 monitor with its 7-inch display and 'TECHN AXX GERMANY' branding, attached to the adjustable mounting stand.

תמונה: אחורי view of the TX-361 monitor, highlighting the ventilation grilles and the attachment point for the mounting bracket.

תמונה: מפורט view of the right side of the TX-361 monitor, showing the power button, reset button, USB-C power input, AUX output, and USB-A port.
4.1. רכיבי מכשיר
- מסך מגע קיבולי בגודל 7 אינץ': Main display for all functions.
- לחצן הפעלה: Located on the top right side.
- לחצן איפוס: Small pinhole button for system reset.
- יציאת USB-C: לכניסת חשמל.
- פלט AUX: 3.5mm jack for wired audio transmission.
- יציאת USB-A: For media playback or charging external devices.
- DAB Antenna Input: Connector for the external DAB antenna.
- רמקול משולב: להשמעת אודיו ישירה.
5. התקנה
5.1. הרכבת ההתקן
The TX-361 can be mounted on your vehicle's windscreen or dashboard using the provided holder.
- Attach the monitor to the mounting bracket.
- For Windscreen Mounting: Clean the desired area on the windscreen. Press the suction cup firmly against the glass and engage the lever to secure it.
- For Dashboard Mounting: Clean the desired area on the dashboard. If necessary, use the adhesive disc provided for a more secure attachment point for the suction cup. Press the suction cup firmly and engage the lever.
- התאם את זווית הצג לאופטימלי viewמבלי להפריע לנהיגה שלך view.

Image: The TX-361 monitor securely mounted on a car dashboard, showing its position relative to the driver's view.

Image: The TX-361 monitor mounted on a car windscreen, demonstrating an alternative placement option.
5.2. חיבור חשמל
- Connect the USB-C end of the power cable to the USB-C port on the monitor.
- Plug the USB-A end of the power cable into the provided 12V/24V cigarette lighter adapter.
- Insert the cigarette lighter adapter into your vehicle's 12V/24V power socket. The device will power on automatically or can be turned on using the power button.
5.3. DAB Antenna Connection
For optimal DAB radio reception, connect the included DAB antenna:
- Connect the DAB antenna cable to the dedicated DAB antenna input on the monitor.
- Mount the DAB antenna on your windscreen or another suitable location, ensuring it has clear line of sight for best signal reception.
6. הוראות הפעלה
6.1. הפעלה / כיבוי
- הפעלה: The device typically powers on automatically when connected to the vehicle's power. If not, press and hold the power button on the top right side.
- כיבוי: Press and hold the power button until the device shuts down. A short press will turn the screen off/on.
6.2. Initial Setup and Smartphone Connection
The TX-361 supports wireless Apple CarPlay and Android Auto via Wi-Fi and Bluetooth 5.0.
- ודא ש-Wi-Fi ו-Bluetooth בטלפון החכם שלך מופעלים.
- On the TX-361 monitor, navigate to the CarPlay or Android Auto section.
- The monitor will display a Bluetooth name. On your smartphone, search for and connect to this Bluetooth device.
- Once connected via Bluetooth, the device will prompt you to enable Wi-Fi for CarPlay/Android Auto functionality. Confirm the connection on your phone.
- After successful pairing, Apple CarPlay or Android Auto will launch automatically on the monitor.
6.3. תפעול מסך מגע
The 7-inch capacitive touchscreen allows for intuitive control:
- בֶּרֶז: בחר פריטים או אשר פעולות.
- לִגנוֹב: ניווט בין תפריטים או רשימות.
- צביטה-להגדלה: (Where supported, e.g., in navigation apps) Adjust map zoom levels.
6.4. DAB Digital Radio
To use the integrated DAB digital radio:
- Ensure the DAB antenna is properly connected.
- From the main menu, select the 'DAB Radio' option.
- The device will automatically scan for available DAB stations.
- בחר את התחנה הרצויה מהרשימה.
6.5. רדיו FM
For traditional FM radio reception:
- From the main menu, select the 'FM Radio' option.
- השתמש בפקדים שעל המסך כדי לסרוק תחנות או לכוון ידנית לתדר.
6.6. אפשרויות פלט שמע
The TX-361 offers several ways to transmit audio to your vehicle's sound system:
- רמקול משולב: Audio will play directly from the monitor's built-in speaker.
- כבל AUX: Connect the provided 3.5mm AUX cable from the monitor's AUX output to your car's AUX input. Select 'AUX' as the input source on your car radio.
- שידור FM: Select an unused FM frequency on the TX-361 and tune your car radio to the same frequency. Audio will be transmitted wirelessly to your car's speakers.
7. תחזוקה
- ניקוי: השתמשו במטלית רכה ויבשה לניקוי המסך וחלקו החיצוני של המכשיר. אין להשתמש בחומרי ניקוי שוחקים או ממסים.
- אִחסוּן: אם מאחסנים את המכשיר למשך תקופה ממושכת, יש לנתק אותו מהחשמל ולאחסן אותו במקום קריר ויבש.
- עדכוני תוכנה: בדקו מעת לעת את הוראות היצרן webאתר האינטרנט עבור עדכוני קושחה זמינים כדי להבטיח ביצועים אופטימליים.
8. פתרון תקלות
| בְּעָיָה | פתרון אפשרי |
|---|---|
| המכשיר לא נדלק. |
|
| לא ניתן להתחבר ל-CarPlay/אנדרואיד אוטו. |
|
| Poor DAB/FM radio reception. |
|
| אין פלט שמע. |
|
9. מפרטים
| תכונה | מִפרָט |
|---|---|
| מספר דגם | 5361 |
| לְהַצִיג | מסך מגע קיבולי בגודל 7 אינץ' |
| טכנולוגיית קישוריות | Wi-Fi (Dual-band 2.4 / 5 GHz), Bluetooth 5.0 |
| תכונות מיוחדות | Wireless CarPlay & Android Auto, DAB Digital Radio, FM Radio, Touchscreen Display |
| טווח תדרים DAB | Band III: 174-240 MHz |
| פלט אודיו | AUX, FM Transmission, Integrated Speaker |
| ספק כוח | 12V/24V via Cigarette Lighter |
| מידות המוצר (D x W x H) | 18.8D x 10.8W x 3.5H סנטימטרים |
| משקל פריט | 0.58 פאונד (כ-263 גרם) |
10. אחריות ותמיכה
Technaxx products are covered by a manufacturer's warranty. For detailed warranty information, please refer to the warranty card included with your product or visit the official Technaxx website. For technical support, troubleshooting assistance, or service inquiries, please contact Technaxx customer support through their official channels.
לעיתים קרובות ניתן למצוא משאבים נוספים, שאלות נפוצות ופרטי יצירת קשר באתר Technaxx official webאֲתַר.