
1. הקדמה
This manual provides detailed instructions for the installation, operation, and maintenance of your Lantronix KVM Serverswitch, model 300.000.9000. This device allows you to control multiple computers from a single PS/2 keyboard, PS/2 mouse, and VGA monitor console. Please read this manual thoroughly before using the product to ensure proper setup and optimal performance.
2. מידע בטיחות
To prevent damage to the product or injury to yourself, observe the following safety precautions:
- ודא שהמכשיר ממוקם על משטח יציב ומאוזן.
- אין לחשוף את המכשיר ללחות, לטמפרטורות קיצוניות או לאור שמש ישיר.
- השתמש רק במתאם החשמל שסופק עם היחידה.
- אל תפתח את המכשיר גasinז. הפנה את כל הטיפולים לצוות מוסמך.
- Disconnect power before cleaning. Use a soft, dry cloth for cleaning.
3. תכולת החבילה
ודא שכל הפריטים נמצאים בחבילה שלך:
- Lantronix KVM Serverswitch (Model 300.000.9000)
- מתאם מתח
- Rack Mount Kit (optional, may be sold separately)
- מדריך התחלה מהירה (מסמך זה משמש כמדריך המלא)
4. המוצר נגמרview
The Lantronix KVM Serverswitch 300.000.9000 is an 8-port KVM switch designed for managing multiple PS/2-based servers or PCs. It features a robust design suitable for server room environments.
4.1 לוח קדמי
The front panel typically includes port selection buttons and LED indicators for active ports.
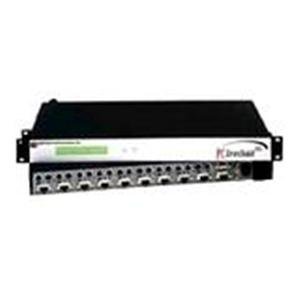
תמונה: חזית view of the Lantronix KVM Serverswitch. This image displays the device's front panel, featuring multiple buttons for selecting connected computers and corresponding LED indicators to show the active port.
4.2 פאנל אחורי
The rear panel houses the console ports for your keyboard, mouse, and monitor, as well as the KVM ports for connecting to the servers/PCs and the power input.
Note: A specific image for the rear panel is not available. Please refer to the physical device for port identification.
5. התקנה
Follow these steps to set up your KVM Serverswitch:
- כבה את כל המכשירים: ודא שכל המחשבים ומתג ה-KVM כבויים לפני ביצוע חיבורים כלשהם.
- חיבור התקני קונסולה:
- Connect your PS/2 keyboard to the keyboard port on the KVM switch's console section.
- Connect your PS/2 mouse to the mouse port on the KVM switch's console section.
- Connect your VGA monitor to the VGA port on the KVM switch's console section.
- חיבור מחשבים: For each computer you wish to connect:
- Connect a KVM cable (VGA, PS/2 keyboard, PS/2 mouse) from the computer's respective ports to an available KVM port on the switch.
- Ensure a secure connection for all cables.
- חבר חשמל: Plug the supplied power adapter into the KVM switch's power input, then plug the adapter into a power outlet.
- הפעלה: ראשית, הפעל את מתג ה-KVM. לאחר מכן, הפעל את כל המחשבים המחוברים.
6. Operating the KVM Serverswitch
The Lantronix KVM Serverswitch offers multiple methods for switching between connected computers.
6.1 Front Panel Push Buttons
Press the corresponding button on the front panel to switch to the desired computer. The LED indicator for the selected port will illuminate.
6.2 החלפת מקשי קיצור
Use keyboard hotkeys to switch between computers without needing to reach the switch. Common hotkey sequences include:
- [Scroll Lock] + [Scroll Lock] + [Port Number]: Switches directly to the specified port.
- [Scroll Lock] + [Scroll Lock] + [Up/Down Arrow]: Switches to the next/previous port.
- Refer to the specific hotkey combinations printed on the device or in a separate quick start guide if available, as they can vary.
6.3 Auto-Scan Mode
The KVM switch may feature an auto-scan mode that automatically cycles through all connected computers, displaying each for a set duration. This is useful for monitoring multiple systems. Consult the device's specific features for activating and configuring auto-scan.
7. תחזוקה
Regular maintenance ensures the longevity and optimal performance of your KVM switch.
- ניקוי: Disconnect power before cleaning. Use a soft, dry, lint-free cloth to wipe the exterior of the device. Do not use liquid or aerosol cleaners.
- אוורור: ודאו שפתחי האוורור אינם חסומים. זרימת אוויר תקינה מונעת התחממות יתר.
- ניהול כבלים: Keep cables organized and free from kinks or excessive tension to prevent damage to connectors and ensure reliable signal transmission.
8. פתרון תקלות
If you encounter issues with your KVM Serverswitch, refer to the following common problems and solutions:
| בְּעָיָה | סיבה אפשרית | פִּתָרוֹן |
|---|---|---|
| No video display. | Loose VGA cable connection. Incorrect port selected. Monitor not powered on. | Check all VGA cable connections. Ensure the correct port is selected on the KVM switch. Verify monitor power. |
| מקלדת או עכבר לא מגיבים. | Loose PS/2 cable connection. Incorrect port selected. Keyboard/mouse not compatible. | Check all PS/2 cable connections. Ensure the correct port is selected. Try a different keyboard/mouse if available. |
| מתג KVM לא נדלק. | Power adapter not connected or faulty. Power outlet not working. | Verify power adapter connection to the switch and outlet. Test the outlet with another device. |
| Cannot switch between computers. | Hotkeys not recognized. Front panel buttons unresponsive. | Ensure hotkey sequence is correct. Try using front panel buttons. Power cycle the KVM switch and connected computers. |
9. מפרטים
Key technical specifications for the Lantronix KVM Serverswitch 300.000.9000:
- מספר דגם: 300.000.9000
- ASIN: B00006B74R
- מותג: לנטרוניקס
- מספר יציאות: 8 (for PS/2 PCs/Servers)
- Console Connections: 1 x VGA, 1 x PS/2 Keyboard, 1 x PS/2 Mouse
- PC Connections: 8 x VGA, 8 x PS/2 Keyboard, 8 x PS/2 Mouse (via KVM cables)
- שיטות מיתוג: Front Panel Push Buttons, Hotkeys
- מידות חבילה: 22.5 x 12.25 x 6.5 אינץ'
- משקל פריט: 11.18 פאונד
- יַצרָן: LANTRONIX
- תאריך זמין ראשון: 21 ביוני 2002
- UPC: 783384222113
10. אחריות ותמיכה
For warranty information and technical support, please refer to the official Lantronix webאתר או צרו קשר עם מחלקת שירות הלקוחות שלהם. שמרו את קבלת הרכישה כהוכחת קנייה לתביעות אחריות.
Lantronix Official Webאֲתַר: www.lantronix.com